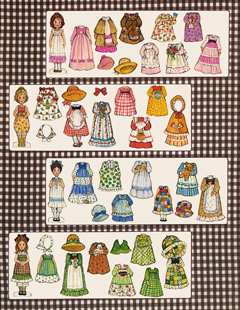
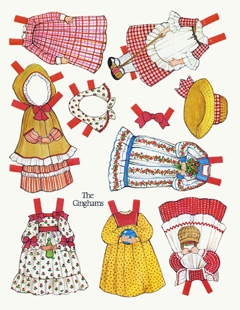
I found these printables of them for free on the internet. Maybe some little girl you know will enjoy them. They would make a cute gift or distraction for a sick or rainy day. :-) The instructions for printing them are at the page.

I found these printables of them for free on the internet. Maybe some little girl you know will enjoy them. They would make a cute gift or distraction for a sick or rainy day. :-) The instructions for printing them are at the page.

Although gift bags are all the fashion these days and are great for reusing, some of us still like wrapped gifts upon occasion. :-) But wrapping paper can be expensive. Here are some ideas for making do or using less expensive methods.
Here are some ideas from "Sister in the Mid-West" at Simple Inspirations:
Among a number of good ideas, she shows an example of writing on paper to decorate it for gift warp. The image above is an example of this that I made some years back. I used my colored Sharpie markers to write "I love you!" in different colors on plain white tissue paper. This was for my husband for our anniversary one year. :-) As she points out in her blog post, you can save paper from packages and reuse paper grocery bags for this as well.
Here are some suggestions:
Wrap a gift for a sewist or crafter in fabric for her to keep.
Wrap bridal shower gifts or a gift for a home maker in kitchen or tea towels.
Wrap a baby shower gift in a light weight fleece blanket.
Wrap a summer birthday gift in a beach towel.
Wrap a house warming gift in a fleece throw or table cloth.
Wrap a set of bed sheets in one of the pillow cases or an extra pillow case.
Wrap various home gifts in a pillow case.
Wrap a kid's birthday gift in a specialty pillow case.
Wrap books in a lap throw (for cozy reading). :-)
These gifts can be held closed with safety pins, ribbon, or low-tack tape that won't ruin the fabrics.

I have made gift bags using old jeans. I used ones that had the hem still intact, but you could use trimmed ratty ones as well. If the jeans are worn too much around the bottom edge try cutting off the hem and washing them to give a frayed edge to work with. Do this before cutting off the legs for the bags. The hem end will be the top edge of the bag.
To make the bags I just cut the bottoms of the legs off below the knee at whatever length I wanted. I turned the pant legs wrong side out and then sewed them shut along the cut edge. Be sure to use a stout needle size for this. Also, it may be difficult to get the machine to sew through the thickest side seam on the jeans. To avoid breaking a needle I used the wheel on the side and gently worked it by hand so that the needle went through slowly and firmly. You could also sew these up by hand if you don't have a sewing machine. Add decorations as you like. In the one in the photo I added a ribbon on one side to tie the bag shut and some "yo-yos" just to pretty it up a bit. You could also paint them with fabric paint.
-------
While I was looking for another photo I found this one of that white tissue gift wrap that I wrote on years ago. :-)
Also, this basket came to me from my mother and she received it as a gift. The lady who gave it to her spray painted it blue, as I recall, to make it fresh. This is another way you can repurpose or re-gift a basket. A little paint can make something look quite new.


Here are two simple and easy ways to make some modern style art for your house. Both methods are quite inexpensive compared to buying regular ready-made art in a store. And since you get to choose your own fabrics, papers, and paints, they will be one-of-a-kind as well.

Photo property of Kelly at The Complete Guide to Imperfect Homemaking
This first one from Kelly at “The Complete Guide to Imperfect Homemaking” uses Styrofoam insulation, heavy fabric, a staple gun (or some similar way to attach it), heavy fabric in a pattern you like or canvas, and some basic picture hanging hardware. Some lighter-weight fabrics would probably work as well. You just don’t want the words on the insulation showing through.
If you have some of these things around your house already (I think we have all of them), it may not cost you anything out-of-pocket. :-) It would be a great way to use up Styrofoam insulation pieces from a home-improvement project.
In the second project she painted on the canvas. One idea to remember is that you can push several canvases together and paint one large picture, then divide it with spaces between when you hang it.
Also, since this is done with Styrofoam insulation, you could use your imagination to add some other items with pins or tacks.
Photo property of Jeni at Becoming Martha
Jeni at “Becoming Martha” made these pretty squares with wood shelving, craft paper, some paint, and picture hanging hardware. She also shows in a second post (here) more of the details of making this and adds some corner holders for 8x10” pictures. With this method you can add your own photos to the art and change them out once in awhile.
-----------
Notice that you could combine these two ideas and make the smaller squares with the Styrofoam insulation. :-)
Here are some home décor items you can make, possibly with things you already have on hand. Most of these could be made with your kids as well and some are appropriate for even young children.
Book Page Pumpkin Tutorial by Kara at “Creations by Kara”.
Here is a cute way to recycle or upcycle a book you don’t want any more. Turn it into a pumpkin. If you don’t have orange spray paint be creative. Let one of the kids color the page edges with an orange crayon or chalk, or do it yourself.
These Newspaper Leaves over at “Life with Little Ones” are a simple project that would be fun with children. You don’t have to use newspaper. White or light colored, light weight paper could work just as well. If you’re careful you might recycle pages from an old phone book or something of a more similar weight to newspaper.
Here are some leaf rubbings that my sister-in-law in Australia made some years ago. As you can see, she made them on plain white paper. This makes me think – you could frame “artwork” like this. Do the various leaves in different fall colors for more pop.
Photo property of Spark & Chemistry
Now this is a project that I really want to make! I might make it non-seasonal by using green leaves or some other translucent covering, though I really like the autumn leaves. Maybe some interesting fabric scraps?
Autumn Leaf, Mason Jar Candle Holder over at Spark & Chemistry by Alicia and Geneane
It’s time for another Cheap, Pretty and Good post. Really this is long overdue, but it’s not a high priority here so…enjoy while you can. :-) All of these crafts are easy enough for kids to do, so they would make nice craft or art projects.
[Disclaimer on all sources, as usual.]
Here is a tutorial over at “Cake.” for a cute garland made with paper doilies. It would be fairly easing to add letters and make a “Happy Birthday” banner, I think. Either way, it will dress up a party without costing too much. (It seems to me that you could use real doilies to make this as well if you have a pile that you don’t know what to do with. You might want to sew them in place with a few stitches and use some pretty ribbon instead of yarn.)
DIY Doily Garland by stephlovesben
With the leftover paper doilies you might like to make these paper roses over at “paper, plate, and plane”:
No Fuss Paper Roses by Jeromina Juan
I think they also look like peony tulips.
(Note: Keep an eye open for paper doilies in February, especially the red ones.)
At “Oh Happy Day” is a tutorial for some simple paper calla lilies.
Paper Calla Lilies DIY by Jordan Ferney
If you’re a paper crafter this could be a nice way to use up scraps. They could be done with inexpensive colored paper of any sort.
Hope you enjoy this little post.